Monday, July 13, 2015

How I Frame Artwork for an Exhibition


By Cecilia Martin


A “Gallery Frame” is usually a simple L shaped frame in either wood or metal. Many art exhibition criteria call for artwork to be framed in this kind of frame.  Here I am talking about the wood frame that we chose to use for our 2015 Botanical Art Exhibition at Artistic Landscape Designs.


I lay an old towel on my table and place my frame on that first to avoid any damage to the frame when working on it.  Once a gallery frame has been selected the first thing I do is drill a very small hole approximately 1/3 of the distance down, on both sides of the frame back, and attach D rings as shown. I attach a length of picture wire between D rings, threading a small 2” length of shrink wrap (available at electronics stores such as Active Electronics) onto the wire before twisting the wire through the D ring. The wire should be pulled fairly tight. Once the wire has been twisted around itself slip these shrink wrap lengths over the twisted wire. This prevents walls getting scratched as well as looking neat. Remove backing board.


Cut a piece of acid free Foamcore board for your backing the same size as your mounted artwork and frame.


Remove the lightweight plastic that came with the frame and replace with 3mil acrylic (plexiglass) cut to size. I prefer to use the plexi for shows, as it looks as good as glass and does not break as easily. Many shows (such as the ASBA) will not accept glass. I am told that good quality acrylic provides UV protection, and the price is comparable to glass. I have kept artwork under this acrylic for about 7 years now and find no change in the look of it, or damage to my artwork. However I don’t know how it would look 50 years from now! If you are planning on keeping your artwork in the “Gallery” frame once you have found a permanent home for it, by all means change it to regular glass with UV protection Remove the blue plastic film from either side of the acrylic.


I then like to give the frame and plexi a good cleaning. For this I use a regular glass cleaner. There are special anti static plexi cleaners, but these do sometimes leave a film on the plexi which could damage your artwork. Make sure there are no streaks left. Hold it up to the light to check.

I also use a can of “Dust Off” to blow away any small pieces of dust left behind.
Insert your matted piece of artwork behind the plexi, and check again for any specks of dust on the plexi or artwork.


Now insert your foamcore. The thickness of the plexi and foamcore may be more than the original plastic and backing. If it’s the same just go ahead and use your original backing with its’ own attachments. However if there is too much thickness for that, I use glazing points to secure this foamcore for the backing. The important thing is to get an acid free backing behind your artwork. 


Voila!! You’re done. 

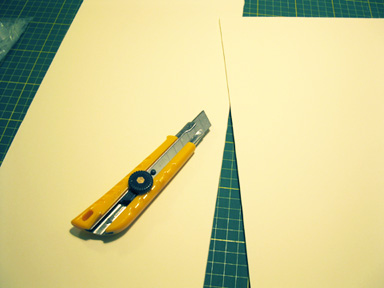
You have saved a lot of money in framing costs, and your artwork is well protected. There is an initial investment in a cutting board, sharp knife, straight edge, and a few other tools if you don’t already have them, but once your artwork is framed this way it is acceptable for most shows. If you want a special piece of artwork in a first class frame to go on your living room wall, then you have the option of getting a professional framer to do it, and spend some of the money you saved on doing your own framing for shows!


Monday, June 1, 2015

Ottawa Society of Botanical Artists
General Meeting

Monday, June 8, 2015

Time: 1:00 to 3:30

Please join us on Monday afternoon for our meeting, guest lecture 
and social get-together

Bring your latest artwork for display to your colleagues.

Presentation


"Print Making" by Deidre Hierlihy 
Deidre will discuss the basics of printmaking with particular emphasis on making prints at home without the large equipment.  She will also be showing samples of her artwork that have a botanical theme.

BIO - Deidre Hierlihy graduated from Queen’s University in 1981 with a Bachelor of Fine Art. Upon graduation, she won the Graff Grant, which enabled her to continue her research and work in printmaking for 12 months at Graff, Centre de Conception Graphique in MontrĂ©al.  In 1984 – 85, she attended Queen’s again in the Artist in the Community program and obtained her Bachelor of Education.  She has been teaching art to children, youth and adults in schools and community settings ever since.  Deidre lived and worked in Japan for 18 months (1987 – 88). During this time she taught ESL and studied Japanese wood-cut printing. She has had solo shows in Toronto, Ottawa, Kingston and Bancroft, and has also exhibited in Ottawa, MontrĂ©al and Japan.

Memberships


New members welcome! Sign up at our meeting. $25 member fee annually. 

Location


Nepean Visual Arts Centre – Located at the Nepean Sportsplex
1701 Woodroffe Avenue, Ottawa, Ontario  
The NVAC is located at the back at entrance 3. 
(For those who have taken classes with Kerri – the meeting is in the same room.)

Friday, May 1, 2015

OSBA Exhibition at Artistic Landscape Designs


For information on hours for Artistic Landscape Designs 
 please see the link below.
Note that the hours for the boutique are different from the garden centre

Wednesday, April 8, 2015

OSBA General Meeting

Ottawa Society of Botanical Artists
General Meeting

Monday, April 13, 2015

Time: 1:00 to 3:30

Please join us on Monday afternoon for our meeting, guest lecture 
and social get-together

Bring your latest artwork for display to your colleagues.

Presentation


"Working with Coloured Pencils" by Anne Armitage B.F.A.
Professional teacher and artist
Supporter of Canadian Guide Dogs for the Blind

Memberships


New members welcome! Sign up at our meeting. $25 member fee annually. 

Location


Nepean Visual Arts Centre – Located at the Nepean Sportsplex
1701 Woodroffe Avenue, Ottawa, Ontario  
The NVAC is located at the back at entrance 3. 
(For those who have taken classes with Kerri – the meeting is in the same room.)

Thursday, March 19, 2015

Trying to Draw an Active Tulip

By Claudia Burns

I forced 5 of the lovely tulips as part of the kind gift of spring flowering bulbs given to me last fall by my art class after the death of my brother.  I had never done this before so wanted to try it out. 

I planted the bulbs in a pot and kept them in the garage until about a month ago when I brought them in as they were starting to sprout.  They have grown well and bloomed beautifully and I will replant the bulbs in the garden this spring.

Photo 1
My plan was to draw and paint one of the tulips but as I was doing other art projects for our recent classes, the tulips did not get drawn.  They opened more and more widely each day in a sunny but cool window and then closed at night.  Yesterday I decided to get at it and because the blooms were already fully open with petals increasingly opening towards horizontal rather than vertical.  I decided I would draw the inner parts, the pistil, stamens, and the attachments of the petals inside.  For reference, I took several photos of the flower in direct sunshine without a flash.  As you can see in Photo 1, the petals are quite open and the internal structures easily visible.


Photo 2
Photo 2 was done with a flash and macro lens to focus on the stamens and pistils (what I planned on drawing). 


Photo 3


I moved the pot to my art room upstairs where the light was much less intense, bright but not sunny.  Low and behold, the flowers, including my chosen bloom, started gradually closing (photo 3).  This was about 20 minutes after photos 1 and 2.  

Over the next hour, the bloom kept closing to its final resting position (Photos 4 then 5).  

In one of the other blooms, which was also, closing I directly observed the actual movement of the petals.  
Photo 4


I wound up sketching the flower in positions 4 and 5 (from life, not photos).  My original plans were stymied by the tulip itself, which had its own intentions.  Certainly makes life difficult for the aspiring artist. 


Photo 5
I was quite amazed at how rapidly this closing occurred.  The fact that the light levels in my art room were not at all dark but obviously a great deal darker than the sunny window that the plants were in originally. 

Sunday, February 15, 2015

OSBA Resource Carousel – Mid-winter Get-together

By Cecilia Martin

On one of the coldest days this winter, fifteen members of the Ottawa Society of Botanical Artists gathered at Claudia’s house for a most enjoyable afternoon, disproving our earlier concerns that we would not get many members out to anything in the winter!

Janet, our president, suggested that the theme for this get-together should be compiling a “Resource Carousel”.  Participants came armed with their favourite books from their own collections, and supplies that have assisted in their artistic endeavours.  They were also ask to list videos, web sites and blogs of interest and to suggest ideas for activities, outings, specialized topics they would like to learn more about and guest speakers they would like have for our meetings throughout the year.

Four tables were set up in Claudia’s spacious ground floor, each area dedicated to a specific topic. When I arrived I was happy to see the dining room table piled high with books, and numerous people around it happily browsing through the collection. Mary did a magnificent job of listing all the books on her laptop during the afternoon, giving us a good start on our project of recording the books in order to make a list available on this blog.

A second table was positioned by a window overlooking Claudia’s beautiful back yard, primarily to list suppliers and supplies people felt were worthy of note.  Inga brought along a light box she had recently purchased, Mary had a useful helping hands stand with a magnifier.  An inexpensive way to help with holding plant material in a stable position.  Carla brought in some brushes that have their own water reservoir, which she is currently experimenting with.  Janet kept records of all information that was shared in this area, and Carla listed many web sites, videos and blogs as our “techie” recorder!  Likewise, ideas for outings, speakers and topics were shared at other tables. 

All of this done with a beautiful background winter scene in Claudia’s backyard, that included numerous woodpeckers’ cardinals and other birds at her bird feeders.


Many delicious treats were contributed by members and tea and coffee served.  There was constant lively chatter and laughter, and the “winter blahs” dispelled from all of us.  It was lovely to re-establish old friendships, and meet new members as well.
We left feeling that we had accomplished a good start to our Resource initiative and happy to spend an exhilarating afternoon and to forget, if only for those few hours, the winter’s seemingly never ending chill.

I would like to thank Claudia for hosting this event for us, and thanks to all who attended and for their participation and useful information and suggestions.

Sunday, January 25, 2015

Botanical Art and Plant Portraits Exhibition


Botanical Art  - Plant Portraits

An exhibition of drawings and watercolours
Nepean Visual Arts Centre
January 15 to March 9, 2015

The plant kingdom is the muse: from seedpods
to sedges, fall leaves to flowers …

This exhibition celebrates the accomplishments, artistry and talents of Nepean Visual Art Centre’s botanical art students.  Mentored by instructor, Kerri Weller, students master the materials and techniques essential to creating realistic drawings and paintings of their botanical subjects.
Please join us to view the art, meet the artists 
and for refreshments!

Vernissage

Sunday, February 8, 1:00 to 3:30 pm
Nepean Visual Arts Centre is located in the Nepean Sportsplex
1701 Woodroffe Avenue at Hunt Club, Entrance 3, rear parking lot

Hours are Monday to Friday: 8:30 am to 9:30 pm, 
Saturday & Sunday: 9:30 am to 3:30 pm


For further info, please call the front desk at 613 580-2424 ext. 46652